Friday, September 9, 2011

Posting more cards soon

Hello everyone,
 Sorry for not posting lately its been a little busy on my side of theworld.  Tomorrow I will be working on a bunch of cards for OWH though,and plan to share them at least by Sunday.

see you all soon!

Monday, September 5, 2011

More old fashioned idea's

Hello all,

I just wanted to give some idea's to help you think of the meaning old fashioned for this months challenge.      
                                      
 Think of your grandmother and the things she did as a girl, think of the old automobiles and trucks. Gingham material, sewing, black and white and sepia photographs, on dusty old scrap pages with heirlooms and hair ribbons, or even little girls wearing frocks or pinafores.

Do you remeber how your grandmother always said not to waste things? I do! and in doing so I have a boatload of scraps to use on other creations, you can enter cards just following that rule, it may not look old fashioned but you just went by an old fashioned rule! ; )

Arlene for example used a kleenex box  to make a frame for this lovely vintage card here

The Above not an option? just use distress inks no matter how modern the look, distressing always gives a vintage feel.

I hope this helps you get started! and in advance thanks for playing along.

Hannah

Saturday, September 3, 2011

Sew old fashioned!

Hope you are having a great weekend!

Today I have an old photo that I hope will hope inspire you for this months challenge.
 Any creative juices flowing yet?  it certainly is for me, now if I can just get the time to do it!

Good Luck.

Thursday, September 1, 2011

The Old Fashioned Way - Sept 2011 challenge

Hello Everyone,
It's the first day of September which means the begining of a new challenge, and This months theme is "Old Fashioned" or doing it the old fashioned way.

.
This Months Prize:
a 10 dollar ecard for Simon Says Stamp!

To enter join our flickr group and upload your cards to the Sept challenge post.
Remember:
1. Limit of 4 entries for each challenge per month
2. Random Drawing will be held the last day of the month
3. If a moderator is not hosting a challenge for the month, the moderator can enter the challenge

Have Fun! and don't forget to check our blog for idea's, to help you with this months challenge.

Wednesday, August 31, 2011

August Challenge ~ Giggles and Grins and the winner is...............

Gina H VV with this beauty
We had 6 very cute and funny entries.. and I used Random Org to chose for me...

Thanks for playing along.... call back soon to see what the next challenge will be...

Cheers
Dawn

Wednesday, August 3, 2011

August Challenge ~ Giggles and Grins

Hi there.... it's my turn to host the monthly challenge  The theme is "Giggles and Grins"  so pull out your die cut machines and let us see what humorous or just down right funny cards, ATC's, scrapbook layouts, or other items you can come up with....

Here's a couple of cards to get you started....


So come over and join us on the Flickr group.... here and lets have a giggle....

Cheers
Dawn

Monday, July 4, 2011

Now & then - with a tutorial

Hi everyone,

This week I thought I would share another card that I made based on an earlier card I had made.  Plus I decided to inflict on you share with you a tutorial on how I made it. 
Here are the two cards:
Ok now for the tutorial.  I think this may be my very first tutorial so please be patient with me :D.

This is what I used.  I forgot to add the scissors & Copics.  I used my scallop circle nestibilities in two sizes for the water & Lily pad.  The frog stamp is by Kaiser craft.
As you can see I've made the "water" bigger than the lily pad just for a bit of contrast.  I have then lined up the scallops (this isn't necessary) before piercing a hole in the two layers. 


 Next punch two flowers out & place together & put a brad in the centre.  Then put the brad through the two layers of scalloped paper & open the prongs.  You should be able to move the Lily pad (top smaller scallop) away from the bottom.  Next step is to attach the frog.


This next step depends on the size of your stamp.  After cutting around the stamped coloured image, I eyeball the size for the flap.  I score about 1/4 inch from each end & apply double sided tape to the ends (on the same side of the c/s).  I then work out how far up the stamped image I need to place the flap & adhere the flap to the image.  After bending up the frogs legs I then attach the other end of the flap to the lily pad.  Just to note it's a good idea to lay your image flat on the card to see if where you have placed it is in a good spot to fit inside an envelope :D (learnt that one the hard way ;P). 

This is the card folded up ready to go into an envelope.  If you look you can see where I've bent up the frogs legs (just so he sits nicely when up) & I have also pushed the flower up around the brad just for interest. 

Well I hope you have enjoyed this tutorial :D.  Sorry if its a bit long.  I think that this type of card would be great for any sort of scene.  Like a bird in a tree or clouds.  Fish swimming in the sea. 

Have a great week everyone & happy crafting xoxoxoxo

Saturday, July 2, 2011

June's Winner & July's challenge :D

Hi everyone,

Hasn't the month just rushed right by?  I can't believe we are into July already. 

Here is our winner for June's challenge - Recycle, Re-purpose & Re-use:
Rosemary, congratulations.  This is one gorgeous card, it looks amazing!  To see more of Rosemary's work please stop by her wonderful flickrstream here.
Also for the month of July I am the hostess.  This month I want to challenge you all to pick a project ie: Card/ATC/LO or anything else you have done & re-do it.  I am calling this challenge "Now & then". 
Just to give you an example here is a card I did when I first started out cardmaking:
This card is the basis for my make over card.  When I made this card it was my first attempt at a new technique Emboss resist. I didn't have a lot of supplies (no cuttlebug either). So I decided to give it a make over.
My "Re-do" card.  I used another new technique - Distress inks on water colour paper. As you can see I've also embossed (cuttlebug this time) & added a nestie. I can't wait to see what you all come up with.

If you have any sort of Die Cutting/ Embossing machine you are most welcome to join in & play along with us over on our flickrgroup.  To enter just go here & follow the prompts.  Thanks for stopping by & I can't wait to see what you all come up with.  Happy Crafting everyone xoxoxoxoxo

Monday, June 20, 2011

June's Challenge - Recycle, Re-purpose and Reuse

Hi everyone,

I hope you all have been well.  It's winter time here in Australia at the moment & rather chilly.  Everyone in our house seems to have a cold :(. 
But that's not why you are here :).  I want to share some of the amazing cards entered into this month's challenge here.
 This first card is by Sue & you can check out her flickrstream here.  I always love seeing what Sue comes up with, her cards are always so elegant don't you think? 
 The very lovely Dawn (one of our wonderful moderators) made this cute card.  It makes me smile everytime.  You can visit here for more wonderful creations.

 This next card is by Marcy & she has kindly included a close up of the recycled paper that she used on her button.  What a great idea :).  Please visit Marcy here to see more of her wonderful cards.
This card is soooooooooo sweet!  I love the way Ettevyke has recycled the tag & her cupcakes look so yummy.  Please stop by Ettevyke's flickrstream here to see more beautiful cards.

Wednesday, June 1, 2011

Announcing May's challenge winner!

Good afternoon everyone,
May has ended and June has come so it is time to, select a winner!  And may I say that you all outdid yourselves with this one! I counted 27 beautiful entries,  seeing all the different styles was so fun!

Drumroll please while I run the random generator

.............................................................................................................
...........................................................................................
And the selected winner for the Show off your style challenge is.....


Congratulations!!!!!!  Please contact me via flickr with your address, and I will get your prize to you

You can also see the other fabulous entries here

Also come join Arlene this month, to recycle re-purpose and re-use!

Tuesday, May 31, 2011

June samples and prize pack from Arlene

Hi All

Arlene has come up with some neat samples of recycling, reusing or repurposing to give us some ideas for the June challenge.... look at these beauties.


just click on the photo to go to her photostream to see how she did these.

and look what she has for the winner of the June challenge....


2 clear stamps
1 small cling stamp set
24 - 5" X 5" Designer Paper K&Company (sharing a stack I just bought
8 - 8 1/2" X 11" designer paper (sharing from my stash)
Die-cut flowers & leaves (various colors)
Die-cut flower buttons (various colors)
Die-cuts (Label 8)- various sizes & colors

So please come and join us.... and let all your friends know.... just make a card/ATC/Layout/Altered item using something recycled, reused/repurposed  and your die cut machine ~ added it to Die Cut Diva's Flickr group and post a photo under June's discussion thread....

Cheers
Dawn

Monday, May 30, 2011

June's Challenge....

Arlene has asked me to post this month's challenge...so here it is..........

I read on the Hero Arts blog of May 13, 2011 that Hero Arts won a 2011 Small Business of the Year award for their sustainability and green business. I know a lot more people recycle, re-purpose, or reuse items, whether it's wood planking from an old farmhouse or a doily for an embellishment on a card. I had already thought of my challenge for the Die Cut Divas flickr group challenge early in the month, but it still needed firming up. No matter what type of recycle, re-purpose or reuse of an item, the card must have a die-cut or be embossed with your machine. Any type of machine is fine.

What kinds of things can be reused, recycled, re-purposed? I use tissue boxes all the time as well as packaging for stockings for die-cuts. I love the idea of doilies, buttons, or stick-pins for flowers making the card scene. I now have a great button die that I love to use because it's not as thick and heavy as a real button. How about turning ribbon into flowers? Yes, that's not recycled, but it is re-purposed.

Have fun! I am publishing this early as I have been locked out of my desktop for about a week and I want to make sure I can get this up and running.

Saturday, May 28, 2011

Flower Tutorial


 In my travels this week I came across a tutorial for the cute flower Heather used on this ATC.  I asked her if I could share it here and yes has agreed....so here it is

***********************************************************************


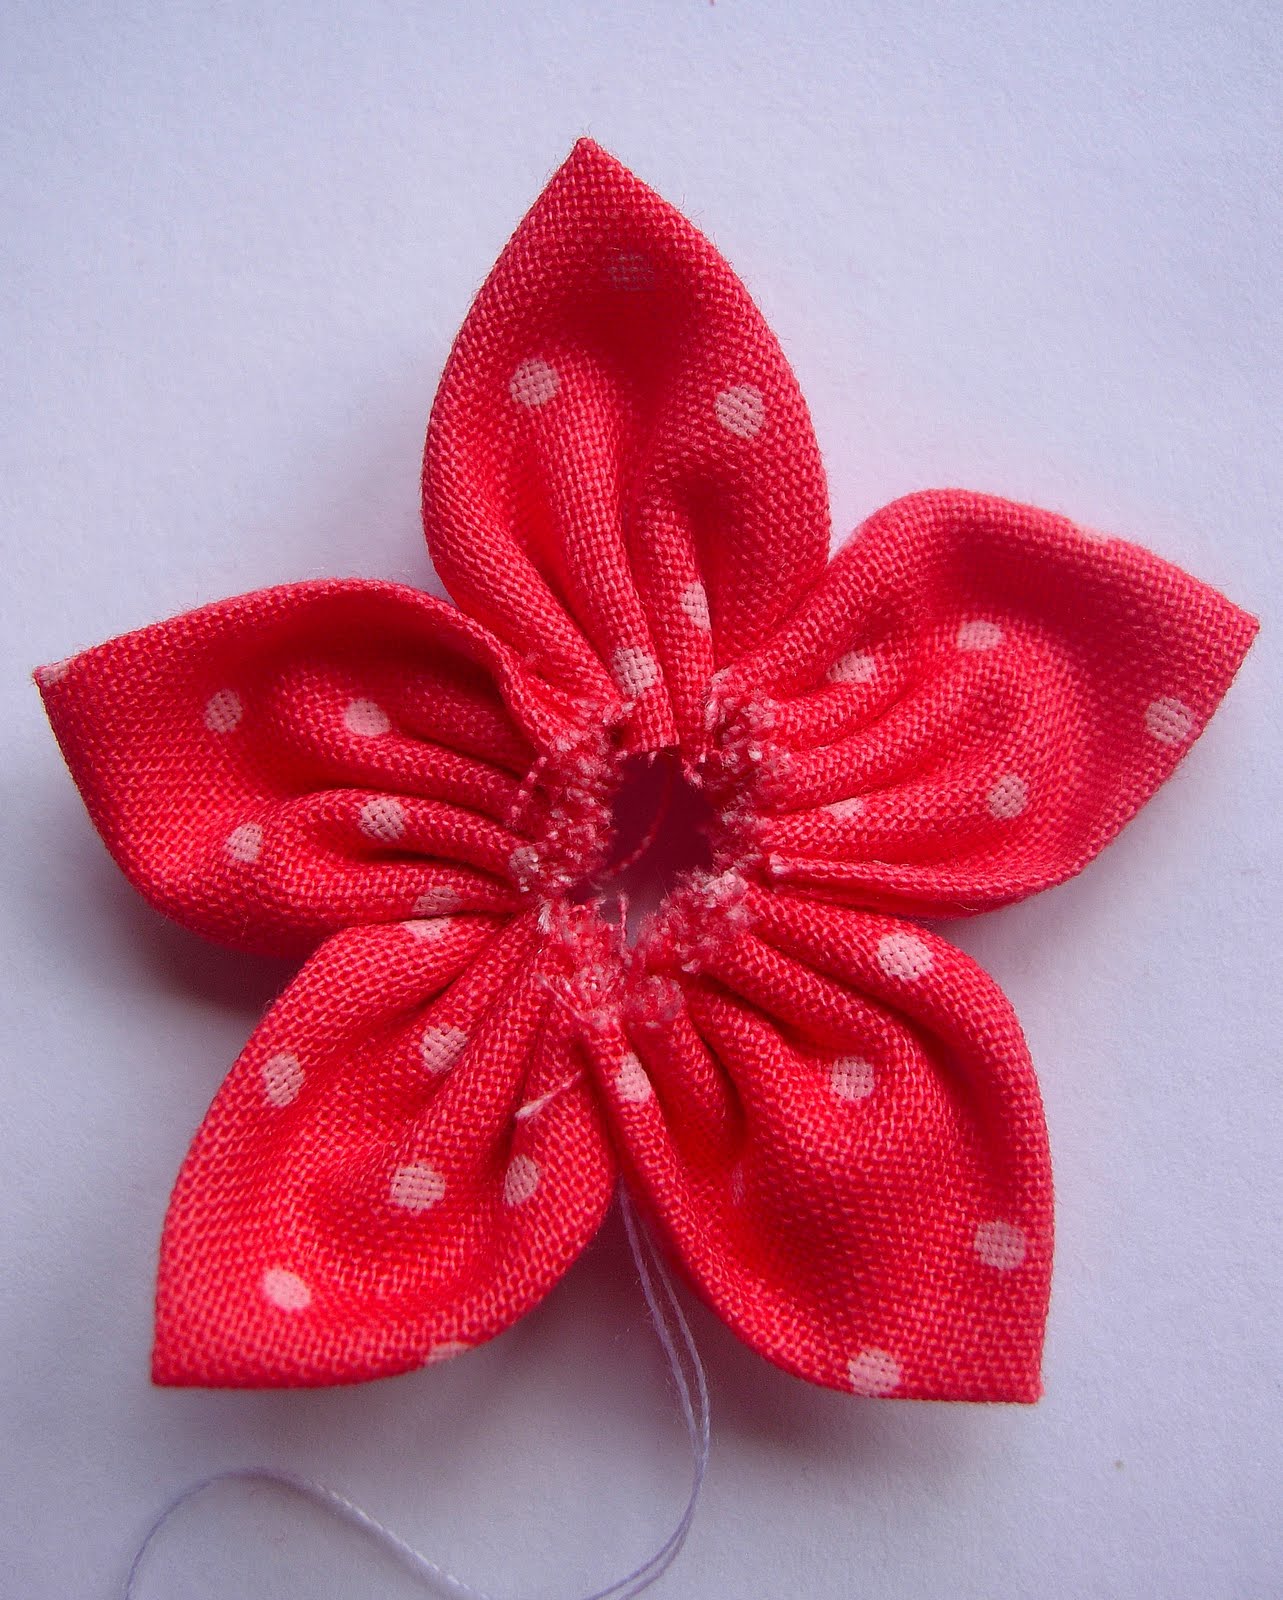
I thought it would be easier to explain in pictures how I made it, so put together a little photo tutorial on the process. The flowers are really easy to make and can be made with just small pieces of fabric - I hope you give them a try!

Cut 5 circles of the same size out of fabric. I used my Cuttlebug which made it really quick.


Fold each fabric circle in half.


Fold in half again.


Using a running stitch sew along the curved side, a little bit down from the raw edge.


Add the next petal to the length of thread using a running stitch.


Continue adding petals with the running stitch until all five petals have been added. As you can see you don't have to be fussy about doing even stitches!


Holding the two ends of the thread, pull tightly to gather the petals together and knot 3\4 times.


Snip the ends of the thread and add a button, large gem or yo yo to the centre to cover up the raw edges.


Isn't this just the cutest ever... thanks Heather for sharing.