Friday, May 31, 2013

Grunge Book

I'm making a commemorative book of the first year of f the Die Cut Divas (DCD) Challenge Blog.  The idea came to me when I was trying to think of samples of work that were not cards.  Sometimes things just pop out at you and this little 6 inch by 6 inch grunge book did.  I was walking the aisles of Hobby Lobby when I saw this nondescript packet hanging about knee level.

Several thoughts ran through my mind, NOT TOO LARGE, NOT TOO SMALL, JUST RIGHT! - that's right I felt like Goldilocks and the Three Bears.  Reading the packet, there are 12 pages, perfect for a year... looking better and better.  Not too much room to fill up, but enough to make it interesting.

Here's what I saw:

Looks interesting with lots of possibilities, right?

Here's what I did:
I colored the grunge paper with Alcohol Inks in a free style.  Taking the alcohol ink applicator in one hand, I squirted the ink in the other hand onto the felt and sponged the ink on the grunge paper.


First I applied Eggplant, then Cranberry and I loved the look of texture this gave my project. I thought metallic and grabbed the copper, dabbed on copper and let the paper dry.   I wanted you to see the vibrancy of the colors as well as what the light and dark of the colors achieved.


 I wondered how I would meld the world of Bugaboo and grunge paper.  My first thought was I needed some letters to at least identify what I was going to put on the page, the month and the sponsor, Bugaboo Digital Stamps.  I dropped the two "o"s and one landed on top of the other, just meant to be.  Distressing the sides of the die-cut panels, I moved them and the letters around until I felt happy with it.

I took the rings out of the bag and Voila.  The first page is finished.  I may add additional papers, perhaps just plain card stock to save something I don't want to lose, but I definitely want to save the sponsor pages.  It's our first year and I just have to have something solid in my hands.


Thank you to Bugaboo for your support of our blog.


Wait until you see what Hannah has in store for you in June!

Arlene and the DCD Design Team


Wednesday, May 29, 2013

Fabric Flower Brooch Tutorial

Fabric Flower Brooch Tutorial


I'd like to say a big "Thank You" to Heather Maria at Stamping and Stitching.  She's so talented and when I asked her to do this tutorial, she promptly agreed.  Dawn was so nice to do a tutorial and told me Heather was going to do a tutorial too and I should ask her to do one for the blog.  Be sure to visit Heather and give her some artist's love - you know, comments!

Here is Heather Maria's tutorial, straight from Heather!

1. Die cut 5 flowers from fabric. I used Dahlia Nestabilities for this brooch but any circular shape would work well.

2. Fold a flower in half.

3. Fold the flower in half again.

4. Stitch the folded flower to the centre of a die cut flower.
5. Stitch the 3 remaining folded flowers onto the backing flower.

Above you can see the tulle before stitching it on below.

6. Die cut a flower from tulle and stitch on.

7. Die cut a circle from felt.
8. Stitch a brooch back onto the felt circle.
9. Add this to the back of the flower by either stitching or adhering with fabric glue.

10. Add a large bead and some pearls to the centre.

If you'd like to make this type of brooch from a flimsier type of fabric like organza, die cut 9 flowers and add another layer of folded flowers after step 5.

These flowers can be made using any type of fabric but if you'd prefer not to have a frayed look on the edges, felt would be a good option.

Thank you so much, Heather, for a wonderful tutorial.  Your flower is so elegant and beautiful.

Arlene & the Divas

Tuesday, May 28, 2013

Who Thinks about Envelopes?

Who Thinks about Envelopes?  Usually not I.  Sometimes, just finishing a card can be time-intensive for me. Other times, not so much.  I just forget about envelopes until it's time to stuff, sounds rather harsh, doesn't it... but, to go on, STUFF a card into an envelope, I just don't think about them (envelopes).  I make cards for gifts for my co-workers (I'm afraid the number seems to increase each year) and just finishing up cards and determining who they are for means working into the night.

However, I wanted to show you how very CUTE the Bugaboo digital stamps were when printed on envelopes and lightly colored.  I did not use Copics which would have bled through the paper.  I used a set of Zig Writers to shade in my stamps.  A very quick and easy process to try, so I hope you consider stamping on your envelopes too.

I figured I'd try this out on my printer and without too much work at all, printed the two images below on a couple of envelopes.  If I can do this, you can do it too.

 I just love Bugaboo's  Friends are Your Umbrella and had the hardest time not coloring TOO much.  This is just a swish of a marker here and there to give some depth, but I did not spend more than a couple of minutes on this at all.  Yet, it so appeals to me.

I printed Stella Peeker - Darth Vader on a large 6" X 9 inch envelope and quickly ran over it with some markers to give it some fun and a bit of depth.  Don't spend time, just a quick couple of colors and a swish here and there of a marker.  I had to color her hair lavender... she just needed a lavender day, the color just leaping off into space!

I hope you enjoyed this quick post to show you that a printed envelope does not require you to spend a lot of time coloring.  (I had no gray, so used a barely brown color on the container) - see you use what you have.

Arlene and the DCD Design Team

Monday, May 27, 2013

Memorial Day

Memorial Day is a United States federal holiday which occurs every year on the final Monday of May.[1] Memorial Day is a day of remembering the men and women who died while serving in the United States Armed Forces.[2] Formerly known as Decoration Day,

it originated after the American Civil War to commemorate the Union and Confederate soldiers who died in the Civil War. By the 20th century, Memorial Day had been extended to honor all Americans who have died while in the military service[3]. It typically marks the start of the summer vacation season, while Labor Day marks its end.

I salute those who died to protect us and preserve our freedoms.

Arlene

Saturday, May 25, 2013

Mixed Media Canvas

Hi Dawn here, popping in to share a Mix Media Canvas I made.


The finishing of the canvas was the flower on the dress form.  It is made with organza cut with my Tim Holtz Tattered Florals die.  The centre was heated with a heat gun causing the organza to shrivel and shrink.   The leaves were cut with a Die-namics die from My Favorite Thing.

More details can be found on my blog post here.

Thanks for stopping by... just a few more days till our challenge finishes so would love to see your creations.


Friday, May 24, 2013

Make me a Calendar and a Bank


Make me a Calendar.  Just for Die Cut Divas, I needed a calendar so I would know when to schedule my posts.   I made one just for me.  These Bugaboo gals are great to color in to make my own special calendar. There's a free digital stamp every Friday - the Friday Freebies!  I make sure I visit Bugaboo on Fridays.  Why don't you?


Close-up of my calender and "Friends are your umbrella" This is the bright close-up - I have the dark close-up too.  There is NO in-between.

This is better, but the umbrella gals are still pretty small to me. I never did get a good shot of my calendar on my cork board above my desk.  I didn't write in what I was posting because you would peek!

A BANK?
I finished a can of Cashews and wondered what I could use it for, rather than just tossing it. Now, make me a bank.   Let's go through the birth of a bank.
Empty can!  Cut quarter size hole in plastic lid.  Apply glue to can and wrap can with white paper.  Decorate as desired.


                                                                     Decorated Sides


My bank is neither glued shut or otherwise securely attached.  I want to be able to RAID my BANK!  This is mostly for quarters so I can pay my meter for work.

Have fun making your homemade projects for fun, laughter, and because you CAN!

Remember to post your "Anything but a Card" here!
Thank you to Bugaboo Digital Stamps, our Sponsor

Arlene and the DCD team


Thursday, May 23, 2013

Before & after Tea box

Hi Lovelies,

Its Paula here to share with you a before/after recycle of a tea box.


As you can see it's a small box, perfect for something tiny to give to that someone special.  I colour in this cute Clyde the Dragon from Bugaboo, with Copics (see below for colour list).  I covered the box with pp & then cute strips (using the other side) to make two sliders to hold the lid down.  I added a paper bow complete with a green brad, to the top & used glue dots to stick it to one of the sliders.  I adhered the digi image in the same way.  I just love how cute this box is, now all I have to do is find someone to give it too lol.

Don't forget that there is still time to enter our May Challenge Anything but a card.  Proudly sponsored by
Bugaboo & the winner will recieve seven digi stamps.  Plus if you use a Bugaboo stamp you get three entries instead of one.


Supplies
Empty box
Double sided pattern paper
Bugaboo Digi image - Clyde Birthday
Green brad
Copics - YG03, YG23, YG17, YG11, Y11, Y15, Y17, B000, B00, B01, B06
Cuttlebug
X-cut Ornate Frames


Wednesday, May 22, 2013

Framed!

That's RIGHT!  I was FRAMED!  I tell ya, I WAS FRAMED.... so says little Bugaboo Rabbit.  

AND guess what, he's right.  He's on the wall above my bed for now.  I think he'd look great in a nursery.  I printed, colored, cut and glue-dotted the guy.  I've been so into Washi tape lately, that's what I thought of to add just a little something to the panel.  I don't think everything should remain UNDER the glass, so I popped this beautiful die-cut butterfly on the glass.

He looks rather mournful, but he is cute.


He's peeking at you!

Hope you liked the framed rabbit.  My granddaughter really liked it!  Who knows where this framed rabbit may go.

Be sure to join our "Anything but a Card" challenge here.

And be sure to visit our wonderful sponsor, Bugaboo Digital Stamps

Arlene and the DCD Team

Tuesday, May 21, 2013

Where does Paula store her Copic markers?


Aren't these the darlingest - I say "darlingest" IS a word...  Thank you to Paula, who is responsible for these delightful containers.  She is just so creative.  I NEVER thought to store my Copics in some cute containers.  She used three different Digi images by Bugaboo. 

Thank you so much for showing us what you do with your Copics and your Bugaboo stamps.  You've inspired me, but I will have to take ACTION and I don't know if I have time this month.  But you never know what will pop up the next time Bugaboo sponsors one of our challenges.  Yes, they'll be back!  Hop on over to see our Sponsor's stamps, so you too, can decorate your containers. 


Also, be sure to join the challenge - the Die Cut Divas' challenge here!  Why?  For the chance to WIN!
I love Bugaboo Stamps badges.  They are sooo much fun!


Monday, May 20, 2013

What a little bag can do

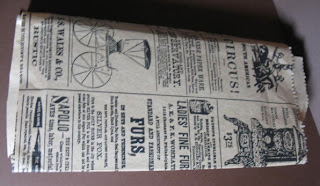
This is the story of a little paper bag.  I'm sure it began its journey like any paper bag, brown and plain.  Some bags become the stuff that artists make into art and some sadly fall by the wayside.  First it became a printed bag with all sorts of yesteryear ads on it.  It was destined to arrive at The Stamp Art Shoppe and hold art supplies for the paper crafter in someone's life.  This bag and another like it came home with me last year.  A flat little bag that waited on its chance for greatness.  Time passed.

I had to choose a challenge for May and the first thought in my mind was "anything but a card."  When I look back on it, I think "why", why did I want to host a challenge that was a "challenge" to me too!  I found a cardboard box that was shaped like a book, not large, but not too small either.  I wanted something I can actually use, not just another pretty thing!.  Here's where paper meets box.

I used Claudine Hellmuth's Studio multi-medium matte to glue the paper onto the box.  I also used it to seal the box.  As I type, the box is sitting beside me drying.  As you can see below, I streaked the outer sides and the inside with acrylic paints, using Apple Barrel Khaki as the foundation, Chocolate Bar mixed with Khaki and Deco Art Dazzling Metalics Glorious Gold streaks along the sides.  No, they don't look much like pages here, but it's not bad from a foot                    away.

The box is covered and painted. 

A little decorating with a lovely Copics colored rose from Bubaboo Digi Stamps and this little paper bag has completed its journey.  I'll finish by decoupaging the box.

I hope you enjoyed the journey of the little paper bag.

Arlene and the DCD Design Team

Friday, May 17, 2013

Anne's Works of Art


Our last day with the super talented Anne Gaal.  Anne is the epitome of the true artist.  From photography to painting, Anne's love of life shows through.  I'm so glad I could share just some of the projects Anne's created.   Be sure to visit and I'm sure you'll follow Anne's blog with as much interest as I do.

What a beautiful set of cards.  

Anne has made available the secrets to this wonderful card and jar set here.  There's also something special about the lid. You must follow this link to see the metallic lid Anne handmade.  Anne just can't help herself from being a unique and talented artist. 

Find out how to make this beautiful Table Topper

Anne guides us through the steps to make this fantastic tree.  I think I might try something like this for next Christmas season.

Anne is a mixed media artist too.  Check out the pieces below here.

Three Muses - an original mixed media piece

Gold Star Memorial for a Fallen Hero


Serendipity Lotus Blossom mixed media original

Arlene and the DCD Design Team